
Arnold with Hair and Fur modifier
Last Updated on 13/01/2018
I stumbled upon one yet undocumented feature that allows you to get the color from the object with Hair and Fur modifier (H&F) and assign this color to the hair itself, rendered through Custom Shader (MAXTOA).
If you assign any Arnold shader in Custom Shader parameter of H&F modifier, color of hair will be ignored on render. Color of hair will depend only on the settings of the shader, which does not have any data on the texture of the object from which the hair grows.
But as it turned out Arnold exports data H&F about hair color and transparency (root_colors, tip_colors, opacity) but does not use them when rendering. Further I will show you how to use this data to change the hair color according to the texture assigned on the object through UVW.
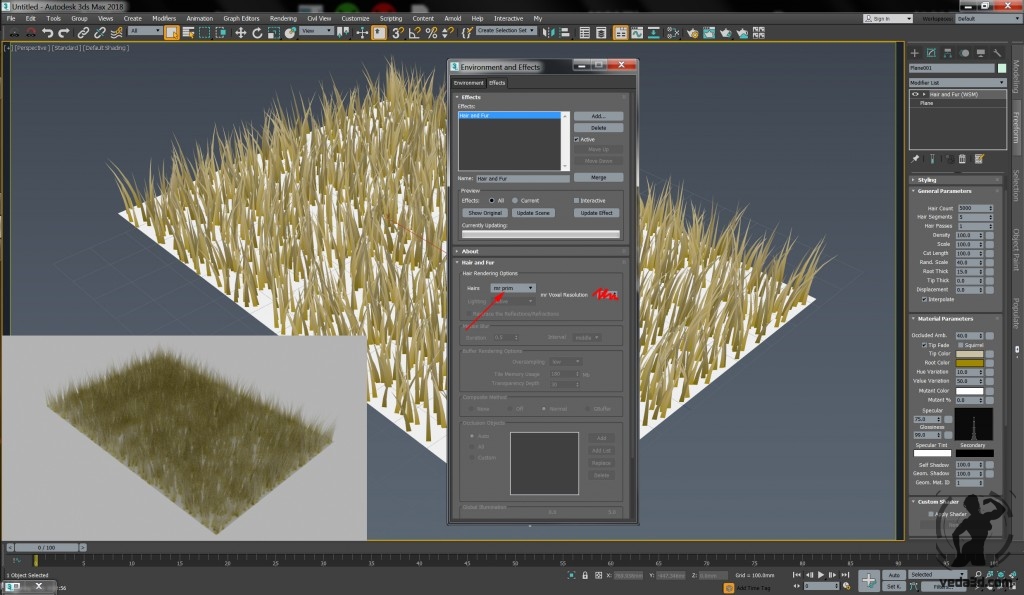
First, after you have added hair and fur modifier to the object you need to go to the settings Environment -> Effects-> Hair and Fur and in Hairs parameter select “mr prim”. Only in this case Arnold will visualize H&F as Arnold curves which are best optimized for the visualization of hair or fur.
The parameter “mr Voxel Resolution” does not affect the visualization of hair in Arnold.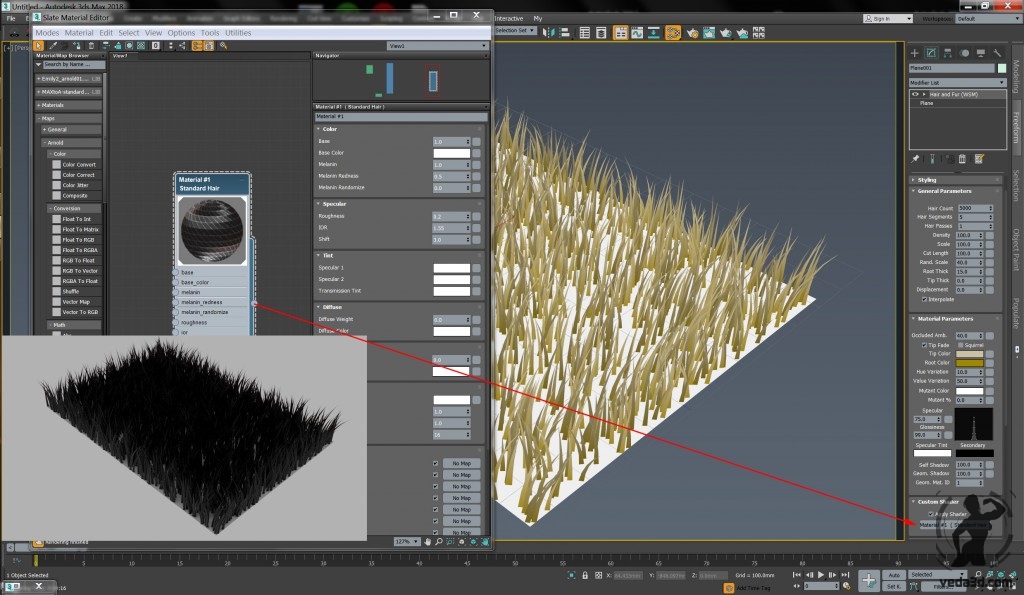
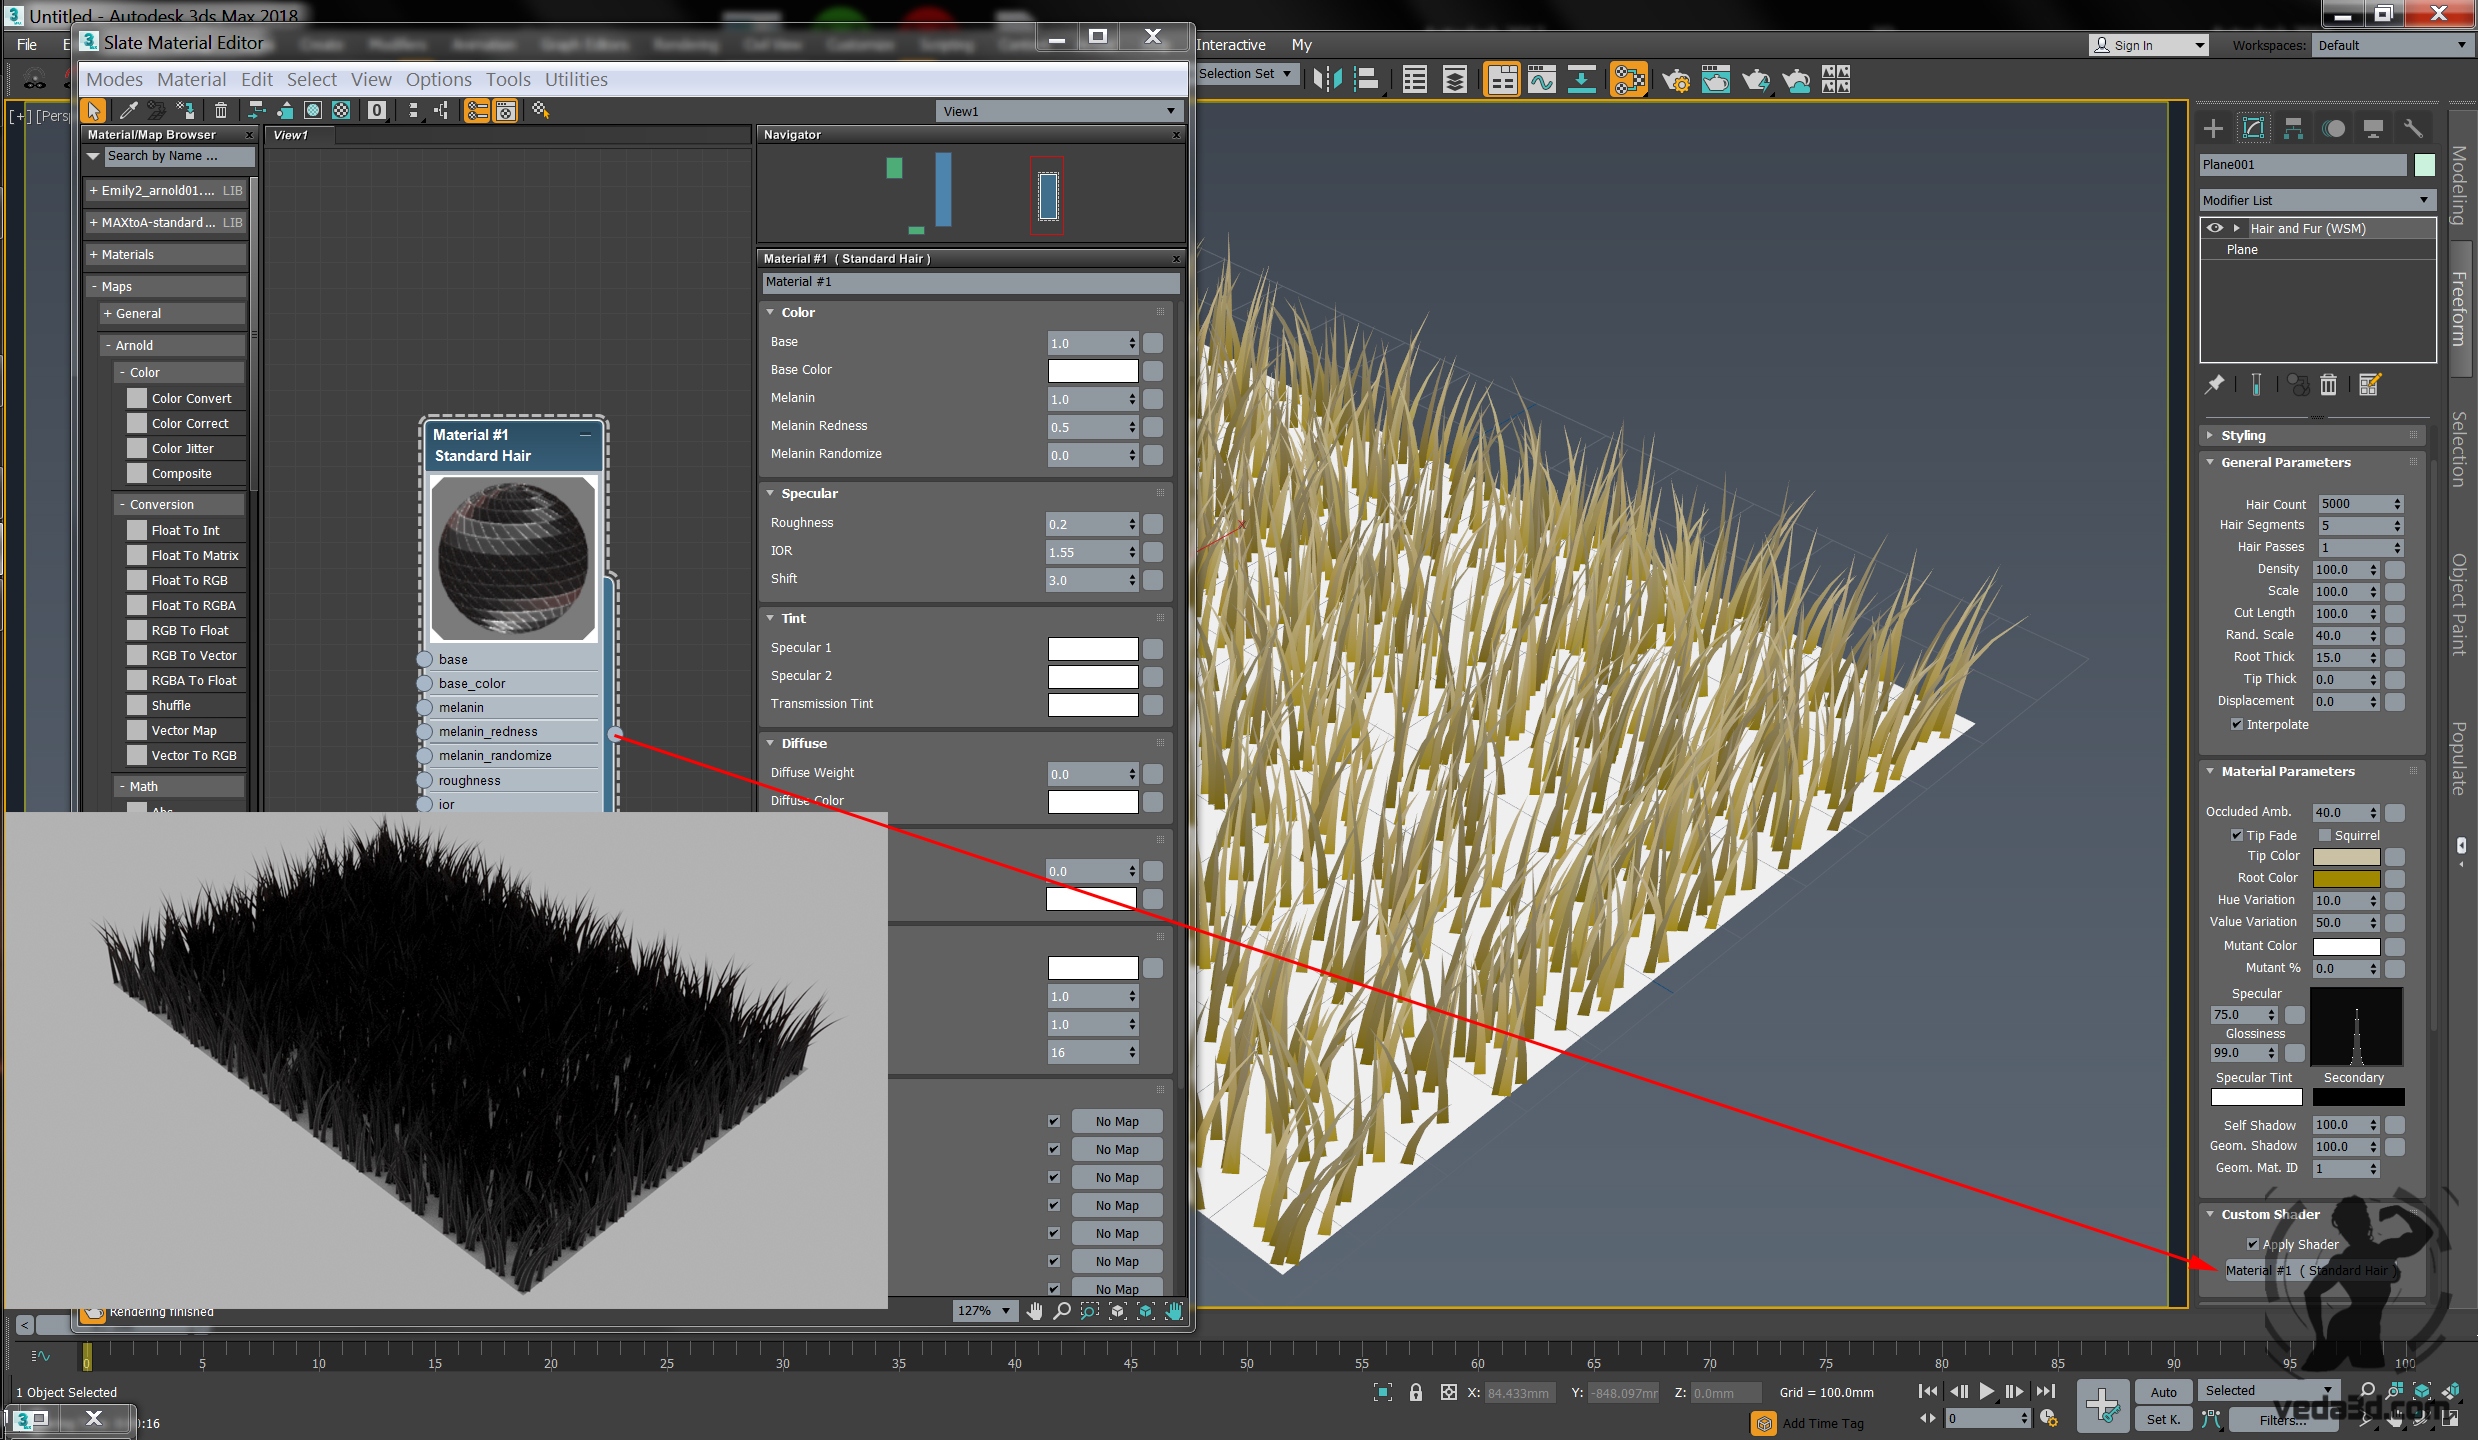
Assign Standard Hair shader to the H&F Custom shader slot. Any other Arnold shader can be used as a hair shader.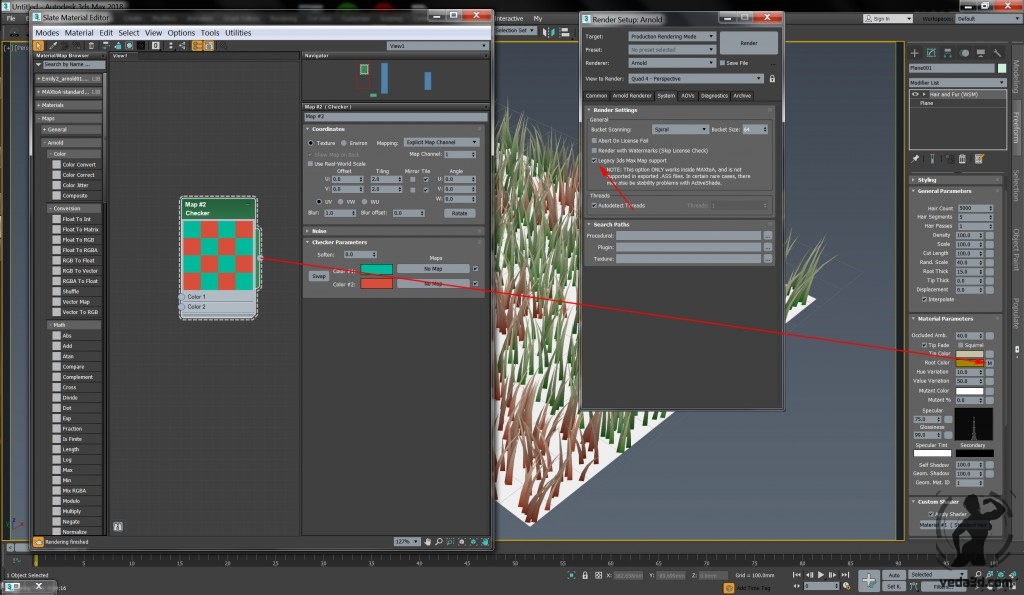
Enable “Legacy 3ds Max Map support” to support 3ds max’s Maps. Add any Map that supports H&F to the Root Color slot. Arnold’s shaders does not support in H&F!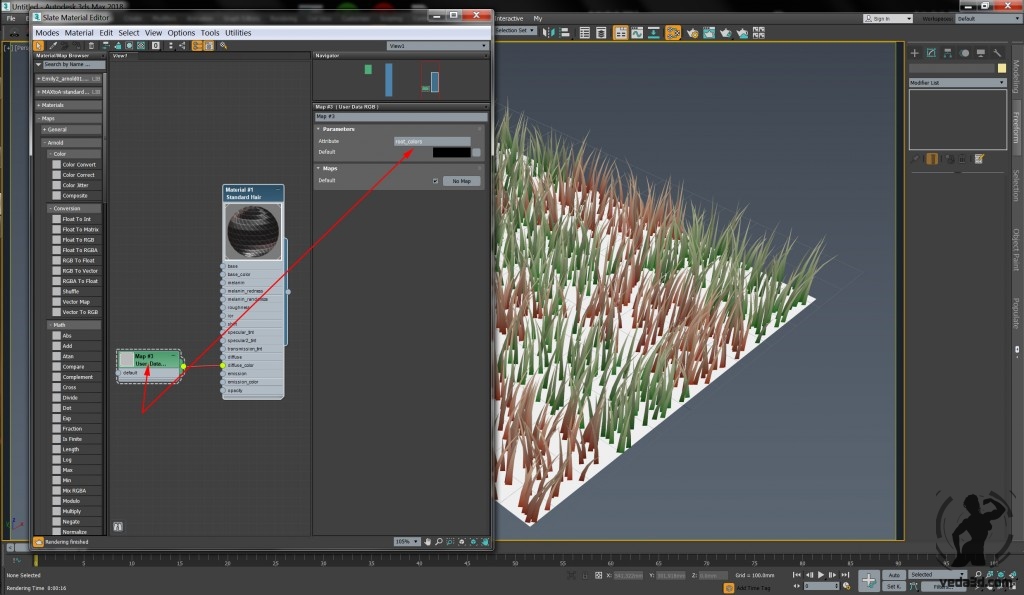
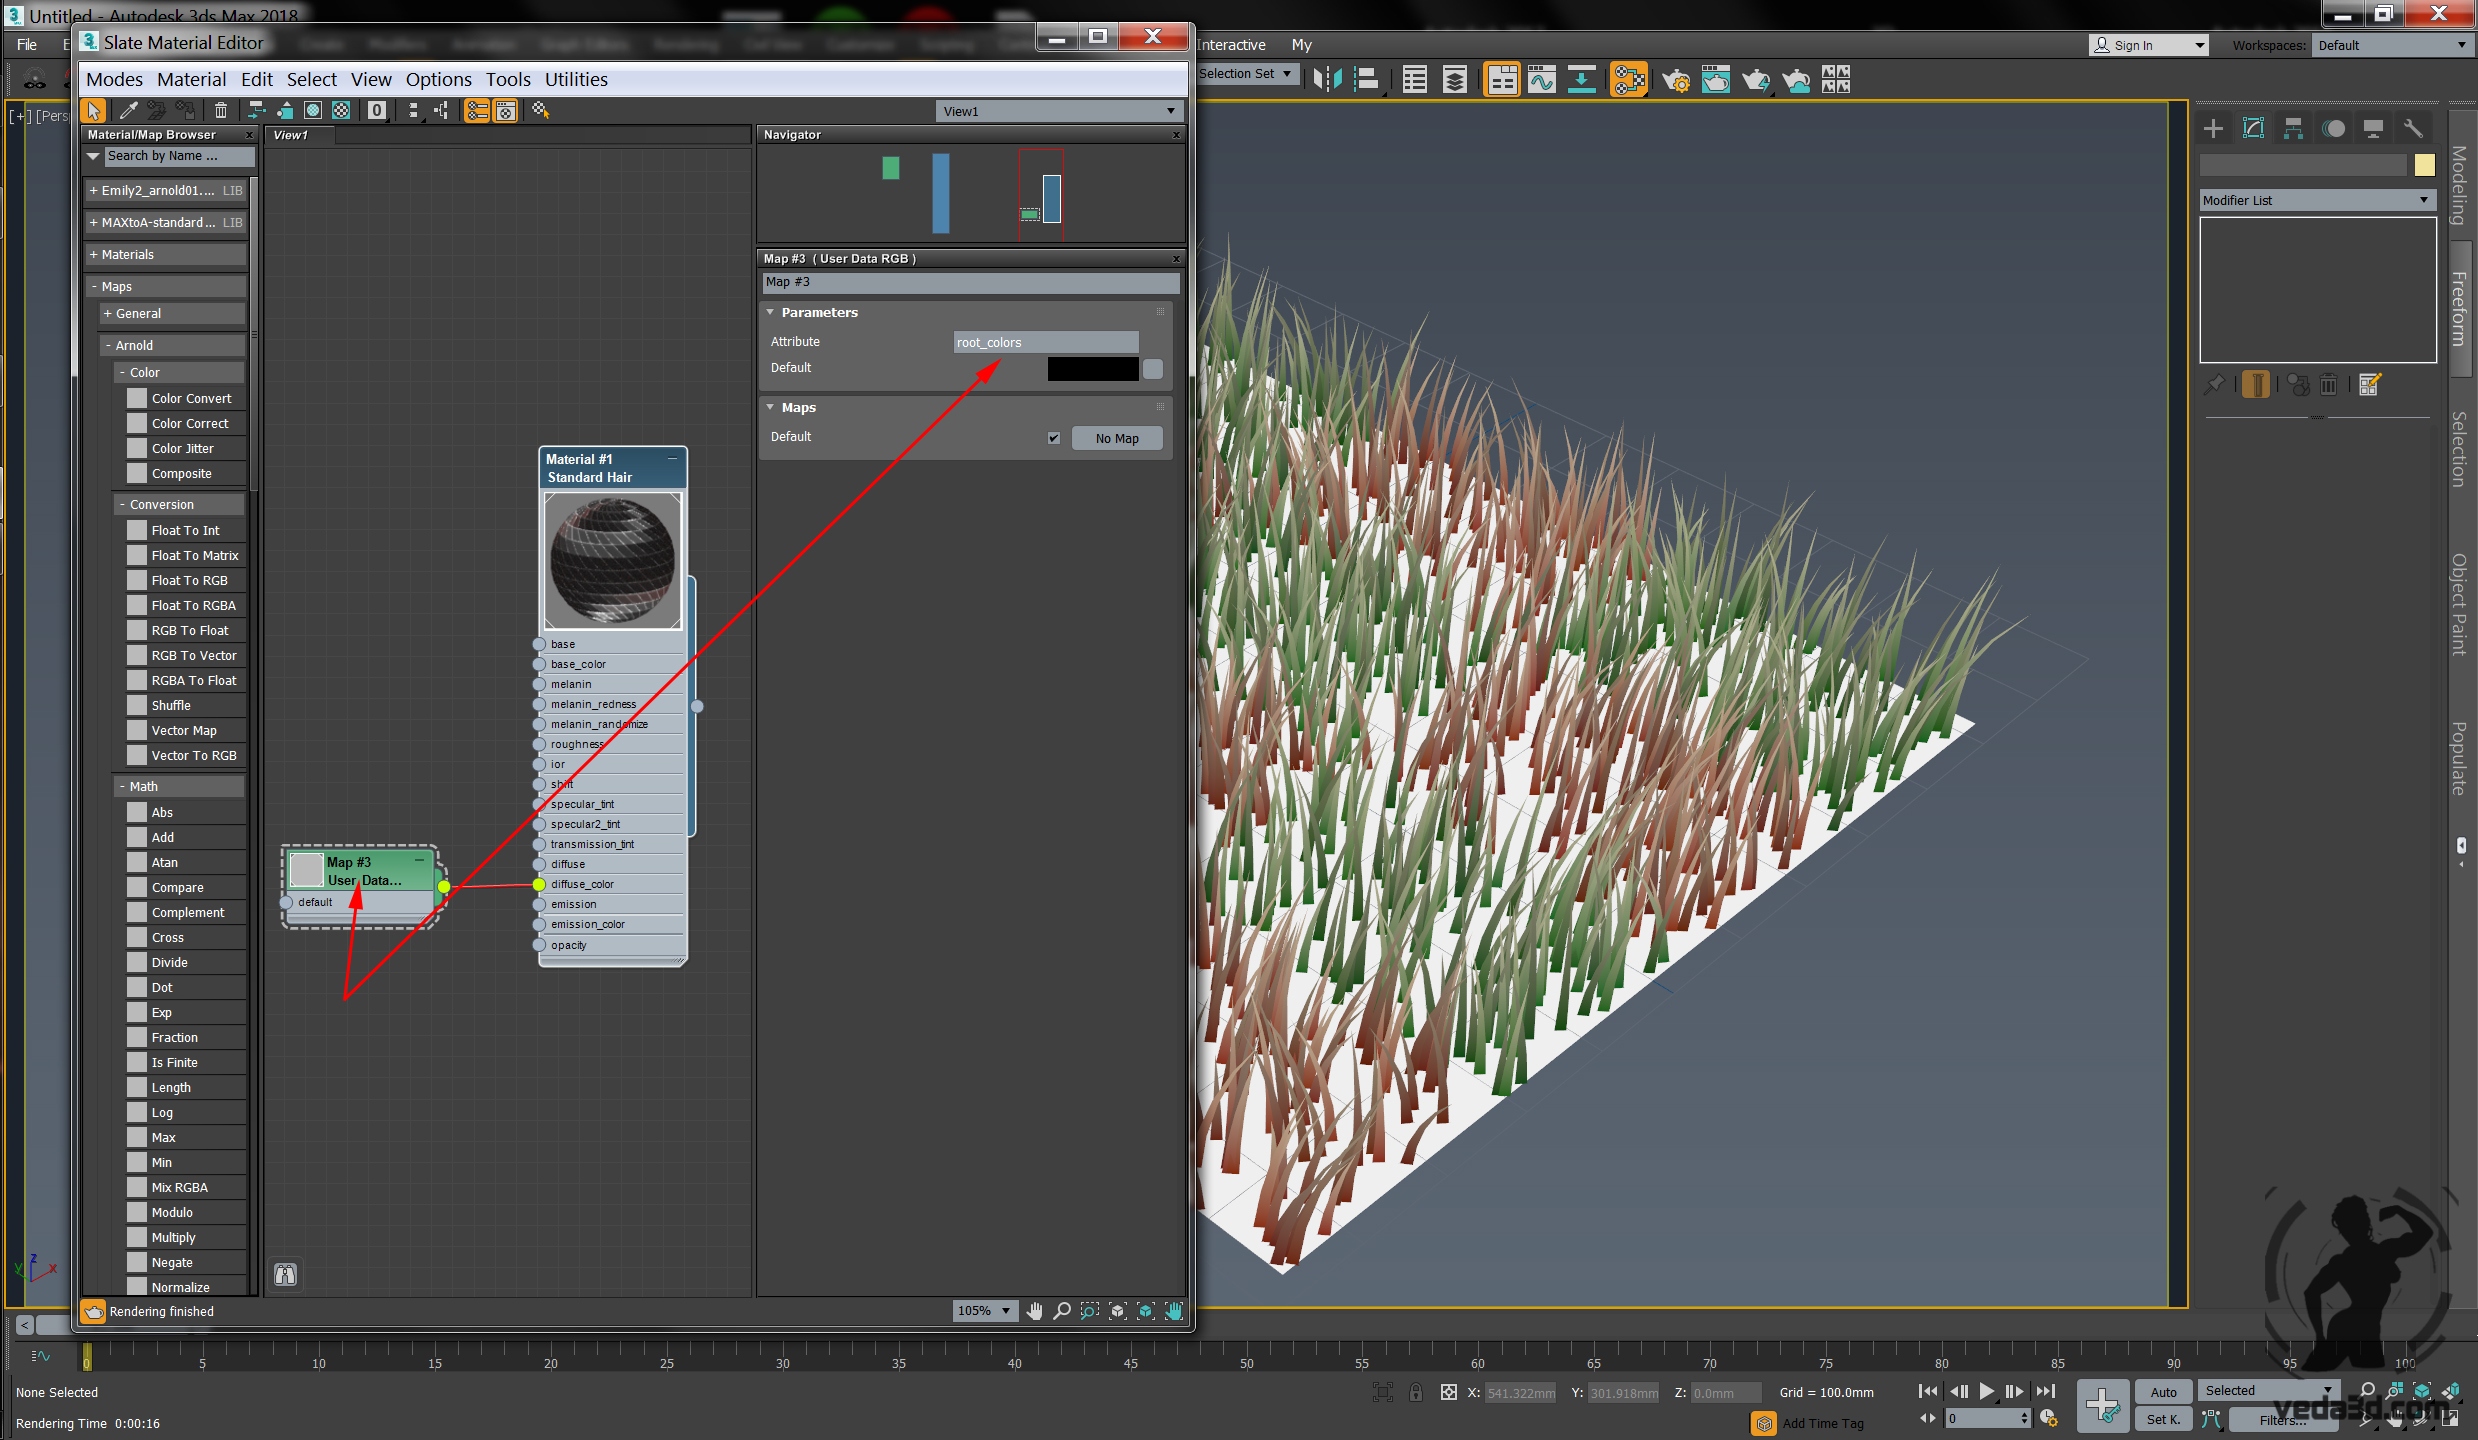
Now in order for Standard Hair shader to start using the hair color that we have set through the Root Color parameter you must add the Arnold shader User Data RGB.
In the Attribute parameter of this shader, you must enter the name of the data, in our case root_colors and attach this shader to the color channel of Standard Hair -> Diffuse_color.
As I said, H&F automatically exports into Arnold three sets of hair color data, what data would you use to set the color of the hair depends on your task. In this example, we’ll only use root_colors.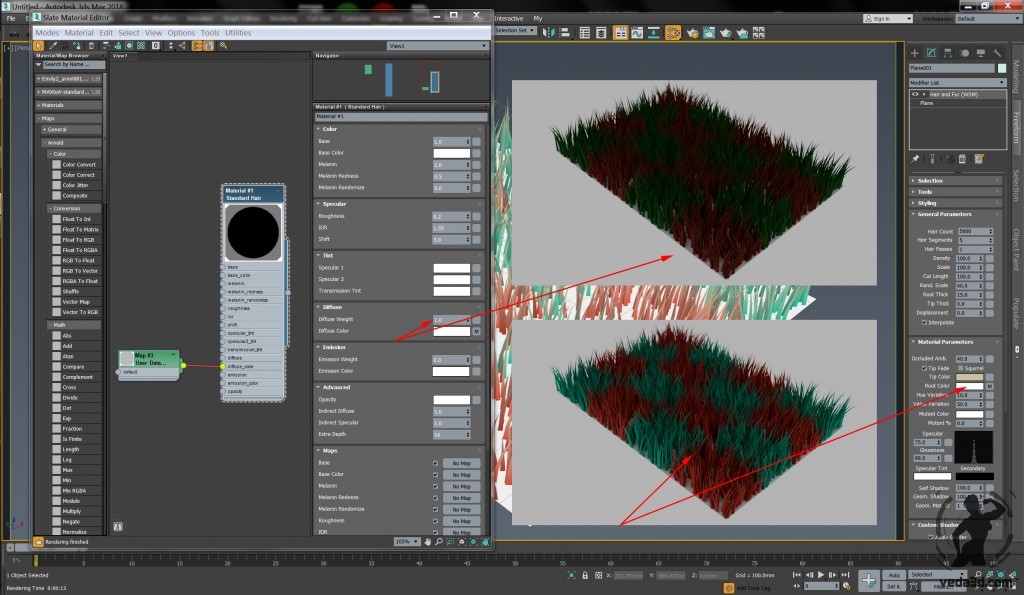
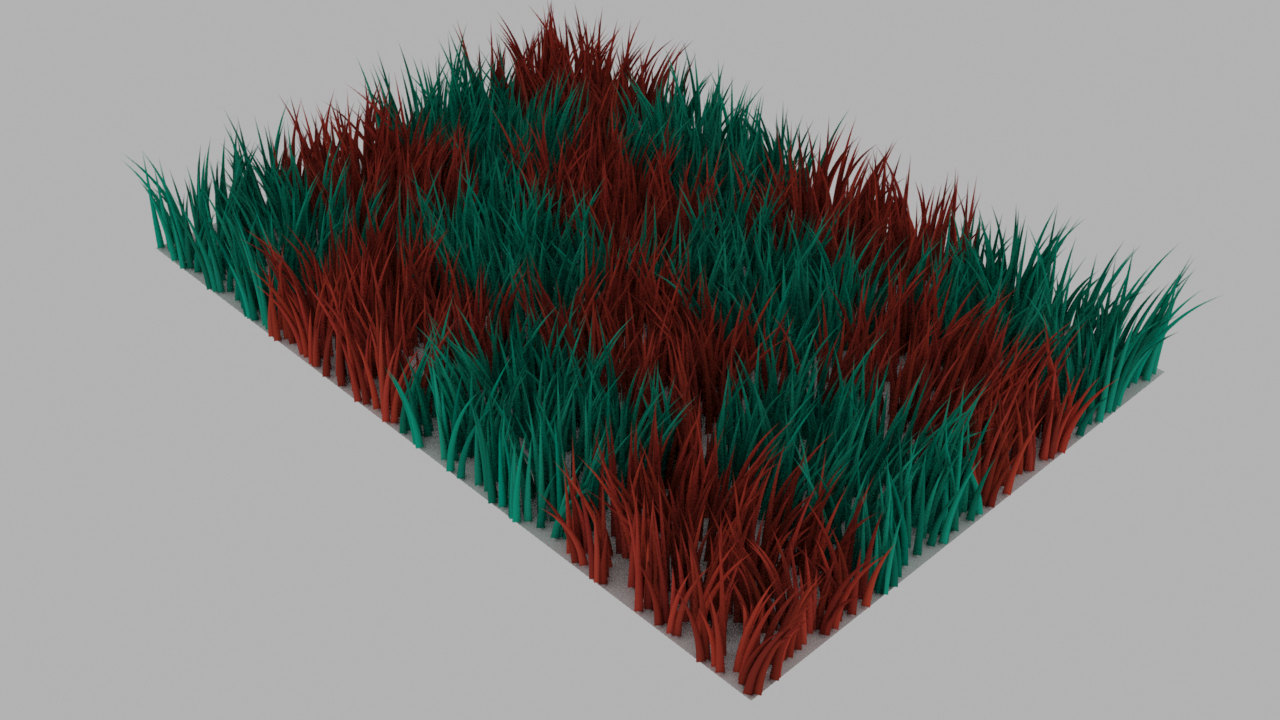
It is necessary not to forget in Standard Hair to change value Diffuse Weight = 1.0 forcing shader to use color data. Also in parameters H&F to change color of Root Color to white (255,255,255) otherwise color of H&F will be mixed with color of map in the same channel.Result:

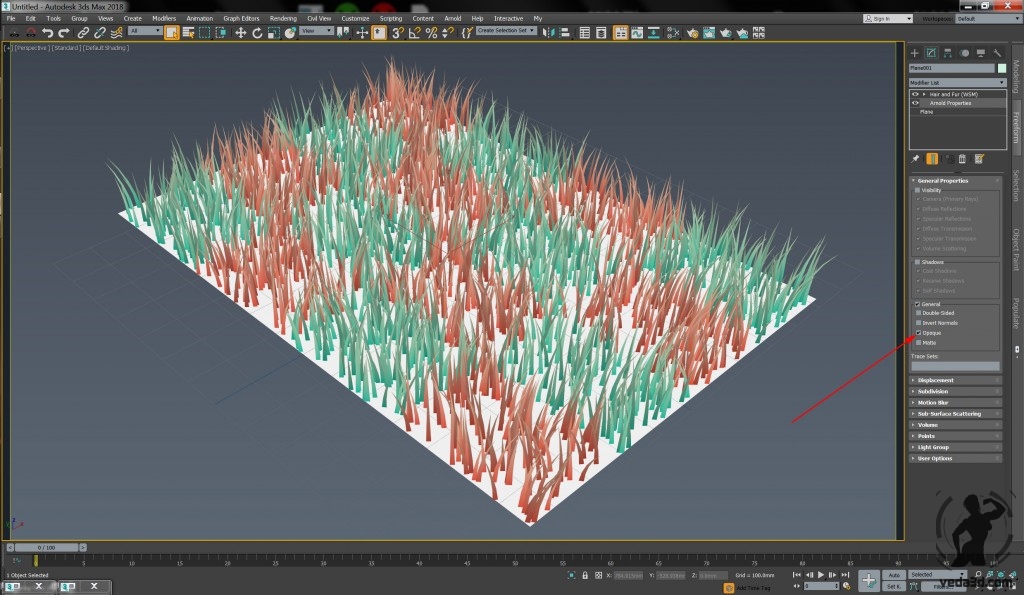
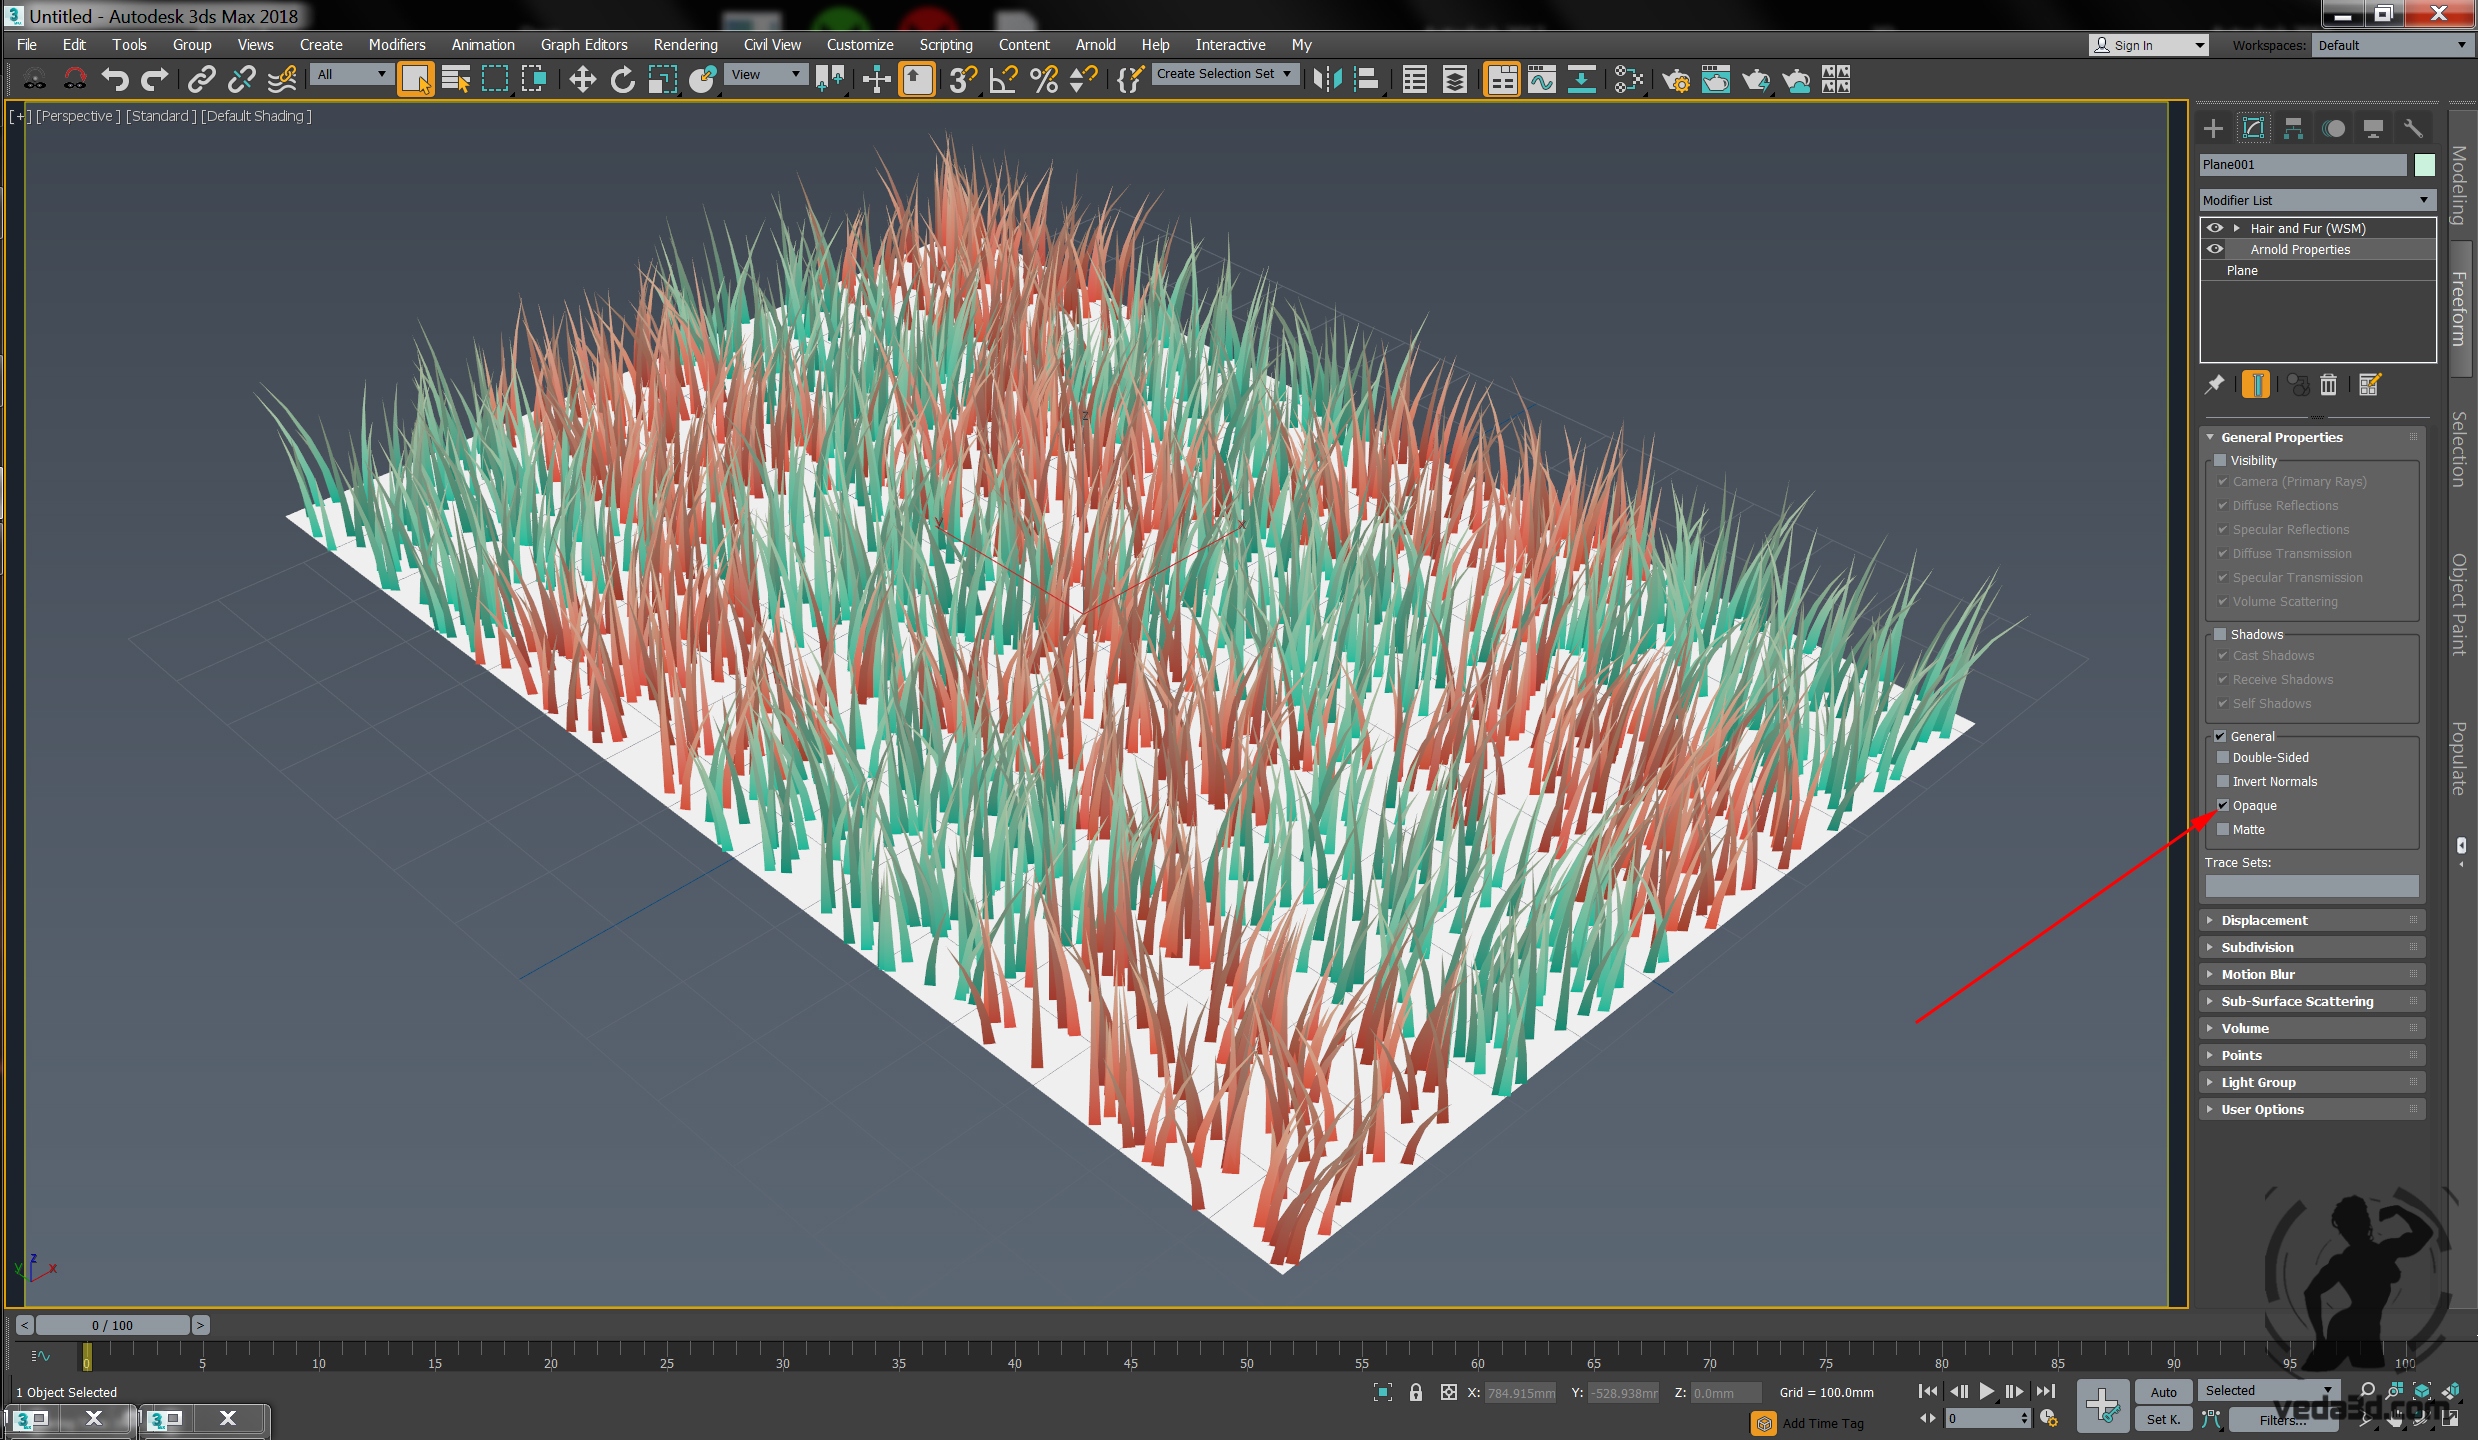
And in conclusion a few words about optimizing the rendering of hair. I want to note that by default the hair from H&F is exported to Arnold without the parameter Opaque, that is make hair transparent. So, if you do not need the calculation of the transparency of hair then you can significantly save the calculation time by adding to the object with H&F the Arnold Properties modifier and switch on Opaque in its parameters.


I swear to Christ, this is the only thing I’ve found that lets me render with Arnold using mr prim hairs and a shader and actually have a flippin’ hair pattern apply. You’re a legend.
Also, attaching the User Data RGB to both the Base Color and the Diffuse Color and putting those both to 1 make *extra* sure any patterns you want to apply really do show up strong.
I’m glad to hear that is works for you! 🙂
I totally agree, thank you so much for saving my time and nerves. I am bookmarking this page!
I love the way you teach. Very effcient. Saved me a lot of time. Thanks so much.
I’m glad to hear it! 🙂
Mr Prim did the job for me – THANK YOU – I HAVE BEEN STRUGGLING! 😀
Dude you saved my life! how did you know this trick?)
Glad to hear 🙂 It’s nothing special when you understand how that tools works internally.
if you have diffuse at 1 , then the specular does not work or the transmission, so you should really lower the value
– the color still shows up fine. its a bit like working with sss shader where the more you increase the diffuse, the less sss you get
how to make the tip/root opacity work though?
You can use instead of Diffuse Base color. User Data node with “opacity” parameter connect to Opacity of Hair Material.
Is there any way to assign both a root and tip diffuse on the same hair? There’s only one diffuse slot, so I wouldn’t know where to put it.
You can use Mix RGBA & State Float shaders to mix root_colors and tip_colors together.
i have an error which rendering…
the script goes as follow:
[MAXtoA]; diffuse:Bitmap : Bitmap has an empty filename.
[MAXtoA]; roughness:Bitmap : Bitmap has an empty filename.
[MAXtoA]; metalness:Bitmap : Bitmap has an empty filename.
[Arnold]: [texutresys] Invalid image file **: ImageInput::create() called with no filename
[Arnold]: [texutresys] Invalid image file **: ImageInput::create() called with no filename
any advice?
I can’t reproduce this behavior and without scene I can’t help 🙁
Is there a way to let the diffuse at 0 ? Because otherwise the hair looks not so real?
You can try connect User Data shader to Base Color parameter instead of diffuse. User Data provide only color data, so how to use it it’s your choice.
Hi, I did everything, and it’s rendering really fast. But I can’t edit the shadow of the hair. No matter what I do it’s always black.
Without Max scene hardly to say what you doing wrong…
Well, if you have a time, I would appreciate if you could check it out. I have uploaded it here:
https://we.tl/t-FIvE3qoqub
Thanks so much
Just switch on “Cast Shadows” in your light. In your scene this option disabled.
Here rendered image of your scene, looks ok.
Yeah I saw that, but that is not the issue. Fur always render darker than the rest of the scene. Try adding some object aside this sphere and change light value.
I found a workaround though, not perfect solution but it’s only one, for now. I added some extra lights (for fur only) and with some Arnold properties (include/exclude lights) I will create special lighting just for fur .. :/
Yes, diffuse in Standard Hair material makes hair unrealistic. Did you try Base Color instead of diffuse?
Here texture connected to Base Color, hair looks pretty bright.
thank you. this worked great. really appreciate it.